
There are a number of websites where you can host images for free, just as there are countless social networks where people happily post pictures of their children, their lunch and their children's lunches. One of the most popular websites used for sharing memes and other potentially viral content is Imgur, a site that describes itself as "the simple image sharer." The free online service is very easy to use.
How to Register for an Account
A user account is not required to upload photos and other images to Imgur, but registering for an account does provide some added benefits. It allows you to keep track of all your uploads far more easily, for instance, and you can only comment and like or dislike other user's submissions when you have an account of your own.
There are two main methods for signing up for an Imgur account, both of which start from the registration page.
Existing Social Media Profile
You can create an account by linking it to an existing account on Twitter, Google, Facebook or Yahoo.
- Simply go to the registration page and click on the corresponding online service. You will be directed to the corresponding authorization page on Twitter, Google, Facebook or Yahoo.
- Confirm that you would like to share with Imgur.com and your new account is created immediately.
Create a New Account
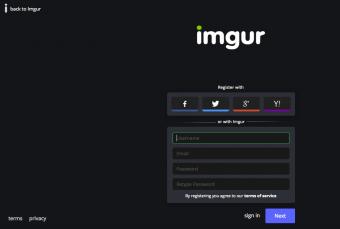
Alternatively, you can register for a brand new Imgur account through the same registration page.
- Enter your preferred username. This will create your account URL, which will be formatted as username.imgur.com.
- Enter your email address.
- Enter your password and confirm it in the next field.
- Complete the Captcha verification.
- Click on the Register button.
- Your account is created immediately. You do not need to verify your email address.
How to Upload Photos
You can upload pictures to Imgur that are either saved locally on your computer or are posted on a public site on the Internet.
From Your Computer
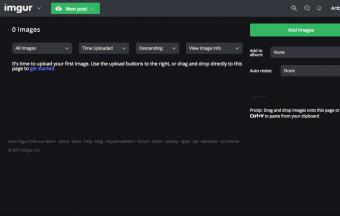
If you have the image file saved on your computer's hard drive, you can follow this set of instructions.
- Log into your account (optional).
- From the main homepage or from your account page, look for the green "Add Images" button near the top of the right sidebar.
- There are two ways to select the images you would like to upload:
- Click on the "Browse" button and choose the file(s) from your computer
- Drag and drop the image files from your computer to the upload area box which appears as a pop-up when you first click on the green upload button.
- As soon as you choose the images to upload, they will immediately load to your account (or to the site if you are not registered)
- You can also simply drag-and-drop images anywhere onto the screen without using the green "Add Images" button.
- You can also create albums and add images uploaded to them using the main dashboard window. To create an album, click on the "All Images" button and choosing "New Album."
- To add images to the album, choose the album you created from the All Images drop-down menu and then click on the Add Images link below it and click on the images you want to add.
From the Web
If you would like to save and share a picture that is displayed on a publicly-accessible web page, use these instructions.
- Log into your account (optional).
- Look for the same image upload box as described above.
- You can provide the image URL in one of two ways to Imgur.
- Copy the URL to your computer's clipboard, then hit CTRL+V from anywhere in the Imgur browser window.
- Click on the green "Add Images" button and enter the URL in the field provided.
- The image will immediately upload. You can then create and add the image to an album by following steps 5 and 6 above.
From Your Email
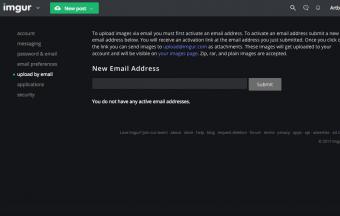
If you verify your email address for your account, you can send images for upload directly from your email.
- To verify your email, go to "Settings" in your user profile and choose "Upload by Email."
- Enter your email address in the field provided and hit "Submit."
- Respond to the activation link that is sent to your email address.
- Once your email is verified, you can email upload@imgur.com and attach the images to your email.
- Images can be in ZIP or RAR formats, as well as common image file formats like JPG, GIF and PNG.
Uploading From an App
If you decide to upload images from your smartphone or tablet, the steps are similar. These steps below are the same for Android and iOS devices.
- At the bottom of your screen, you will see a camera icon. Tap the icon.
- The first time you do this, you will be asked to "Allow Imgur to access photos, media and files on your device?" Click on "Allow."
- The images on your device's gallery will appear, or you can use your camera to take new images to upload. Tap on all the ones you want to upload and then click on the green "Next" button in the upper right corner.
- You will have to give your images a post title if you are posting them publicly. You can also choose whether you want the images to be public or private by clicking on the drop-down menu right under the post title field.
- When you are done, hit the "Post" button in the upper right corner. If you want the images to be private, the button will say "Upload" instead.
Sharing and Other Useful Tips
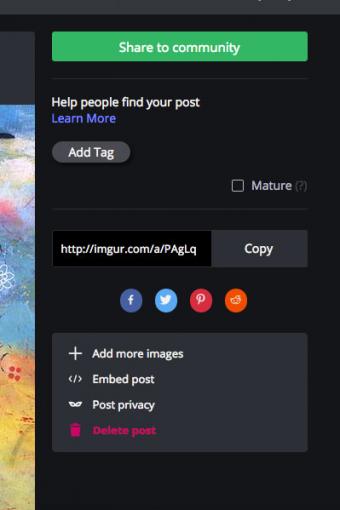
Although Imgur is a very simple image sharing utility, it also comes with a number of optional features that you may find valuable.
- Sharing buttons: On every image page on Imgur, there are a series of small icons for sharing that image on your favorite social networks, including Facebook, Pinterest, Google+, Tumblr, Reddit and many more. Click on the corresponding icon to share on your social media platform of choice.
- Links and codes: After you have uploaded an image, you will be sent to that image's page. Along the right side are a series of text boxes that contain the image link, as well as the specific code to embed the image (HTML) on a website, share it on message boards and forums (BBCode), and the markdown link for Reddit comments. Copy and paste these links and codes accordingly.
- Title and description: With every image that you upload, you can add a title and description from the individual image page. You can find the links to do so near the top right of the screen.
- Edit: There is also an "edit image" link near the screen's top right that provides you with a very basic in-browser editor where you can crop, resize, and rotate your picture, as well as access more advanced features like removing redeye, adjusting brightness or applying effects.
- Community features: The social aspect of Imgur is reflected below each image, as it can be "liked" or "disliked" to earn a certain number of "points." You can also "favorite" images and submit comments, each of which can also be liked or disliked too. All of these features can be found below the image.
- Make a meme: Below the "Upload images" dialog in the right sidebar of the main page is a button to make a meme. Clicking on this will allow you to select an existing popular meme image or you can upload a new background. Then, you can add your meme-worthy text and save the resulting image to share.
- Request deletion: Did you upload an image that you would now like remove from Imgur? There is a simple image deletion form that you can fill out where you can list multiple images to be deleted, providing the reasons why they should be removed. You can delete your own images from your own account, but this form can be used to request the removal of other people's pictures too. To delete an image in your account, simply hover over the image with your mouse and a trash icon will appear. Click on the icon and then click on the "Delete" button to confirm deletion.
Configuring Your Privacy Settings
If you decide to upload images that only you want to see, or only people that you send a link to, you can set your albums to be "Hidden." Albums set to "Public" can be viewed by anyone who visits the Imgur website. The link for your public album will be username.imgur.com.
When you first create an account, Imgur sets your default setting to "Public."
- To change your account to "Hidden," go your profile by clicking on the arrow next to your username in the upper right corner and choose "Settings."
- Choose "Account" in the side navigation menu on the left.
- Under Default Album privacy, click on the selection in the field to choose "Hidden."
- Click on the "Save" button at the bottom of the page.
- You can use the same steps to set your account back to "Public."
- Note, you can only do this on the website version of Imgur. If you are using the app, you can make certain albums "Hidden" or "Public," but you cannot set the entire account to be "Hidden" or "Public. "
If you want your account to be public but you want to set certain albums to be hidden, in the account dashboard, choose the album from the "All Images" drop-down menu.
- Click on the "Edit this Album" button.
- Chose "Change Settings."
- A pop-up window will display. You can click on "Public," "Hidden" or "Secret."
- "Public" means anyone can see your album.
- "Hidden" means only people that you send the direct URL to can see your album.
- "Secret" means you are the only person who can see the album and you can only see it if you are logged in to your account.
If you do not have an Imgur account and choose to post photos with creating one, any images you upload will be hidden, although you can share them with others by sending them the direct URL. Imgur cautions users however that once you share a direct URL to a hidden photo or album on a social network, then it can be shared to others and is no longer 100% anonymous.
Free and Easy Way to Store Images
In addition to other image sharing sites like Flickr and Photobucket, Imgur is also a fantastic way to store your unique pictures on the web. It is particularly popular with funny images and with memes, giving you a simple method for participating in all the humor.


